

This guide will teach you how to deploy a Kubernetes Version 1.23. with CRI-O on RHEL 8 behind Corporate Firewall and Proxy Setting.

VM Servers with 1 Master and 2 Worker Nodes.
Steps for installation
1. Setting up Hostname for VM Servers
sudo hostnamectl set-hostname master-node-k8
sudo hostnamectl set-hostname worker1-node-1-k8
sudo hostnamectl set-hostname worker2-node-2-k8
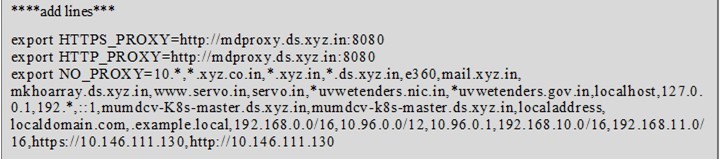
2. Proxy Settings
Setup proxy in all the 3 VM servers
For Master Server ##
sudo vi /etc/environment
cd /etc/systemd/system
mkdir kubelet.service.d
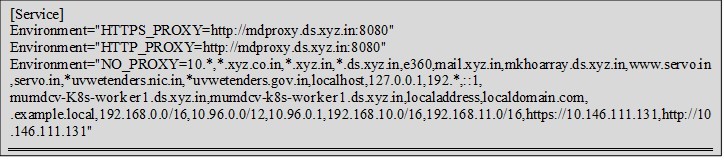
vi http-proxy.conf

cd /etc/systemd/system
mkdir crio.service.d
vi http-proxy.conf

Set .bashrc file /root
vi .bashrc

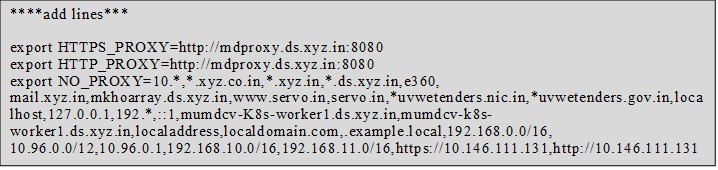
### For Worker 1 ###
sudo vi /etc/environment
cd /etc/systemd/system
mkdir kubelet.service.d
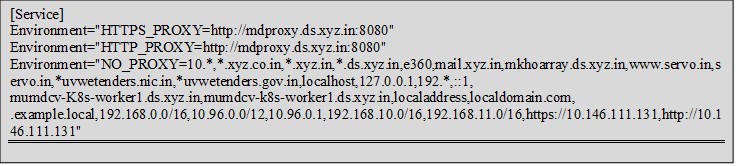
vi http-proxy.conf
cd /etc/systemd/system
mkdir crio.service.d
vi http-proxy.conf
vi .bashrc

### For Worker 2 ###
sudo vi /etc/environment

cd /etc/systemd/system
mkdir kubelet.service.d
vi http-proxy.conf

vi .bashrc

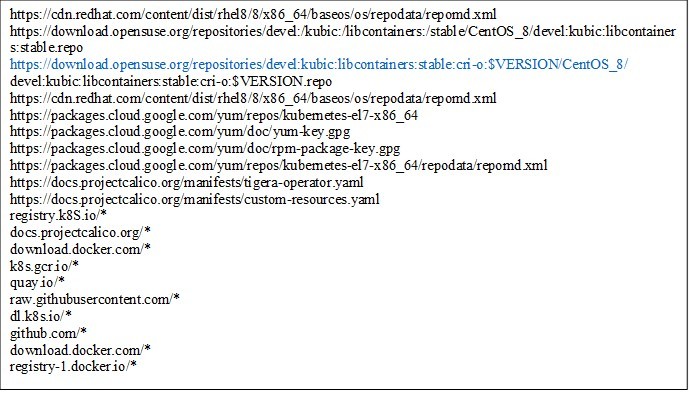
Ask you Network Team to whitelist the below URL’s in Proxy
URL`s for Whitelisting
3. Disable swap
sudo swapoff -a
vi /etc/fstab
# and remove or comment the line contain swap
4. Disable SELINUX

REBOOT THE SERVER
5. Configure networking in master and worker node
sudo vi /etc/hosts
#update the entries as shown

6. Create a modules configuration file for Kubernetes
sudo vi /etc/modules-load.d/k8s.conf

sudo modprobe overlay
sudo modprobe br_netfilter
7. Configure the required sysctl parameters
sudo vi /etc/sysctl.d/k8s.conf

8. Run the command
sudo sysctl –system
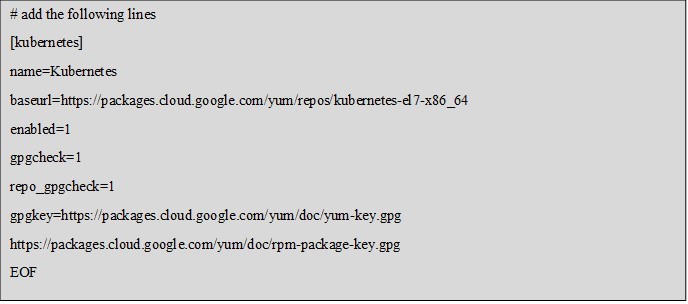
9. Install kubelet, kubeadm and kubectl
sudo vi /etc/yum.repos.d/kubernetes.repo
dnf install kubelet-1.23.12 kubeadm-1.23.12 kubectl-1.23.12 –disableexcludes=Kubernetes
10. Check the Version
Kubelet version –client
11. Install Container runtime (CRI-O)
export OS=CentOS_8_Stream # or OS=CentOS_8
export VERSION=1.23 # it must match your kubernetes version
# Add repo
curl -L -o /etc/yum.repos.d/devel:kubic:libcontainers:stable.repo
https://download.opensuse.org/repositories/devel:/kubic:/libcontainers:/stable/$OS/devel:kubic:lib containers:stable.repo
curl -L -o /etc/yum.repos.d/devel:kubic:libcontainers:stable:cri-o:$VERSION.repo
https://download.opensuse.org/repositories/devel:kubic:libcontainers:stable:cri-o:$VERSION/$OS/devel:kubic:libcontainers:stable:cri-o:$VERSION.repo
# Install CRI-O
dnf install cri-o
# Start and enable CRIO service
systemctl daemon-reload
systemctl enable crio
systemctl start crio
systemctl status crio
12. Allow Firewall Rules
================================================================= # FOR MASTER
firewall-cmd –add-port={6443,2379-2380,10250,10251,10252,5473,179,5473}/tcp –permanent
firewall-cmd –add-port={4789,8285,8472}/udp –permanent
firewall-cmd –reloadx86_64
================================================================= # FOR WORKER
firewall-cmd –add-port={10250,30000-32767,5473,179,5473}/tcp –permanent
firewall-cmd –add-port={4789,8285,8472}/udp –permanent
firewall-cmd –reload
=================================================================
13. Install control-plane node
lsmod | grep br_netfilter

14. Enable kubelet service

15. Pull container images
sudo kubeadm config images pull

sudo kubeadm init
[root@master-node-k8 ~]# kubeadm init

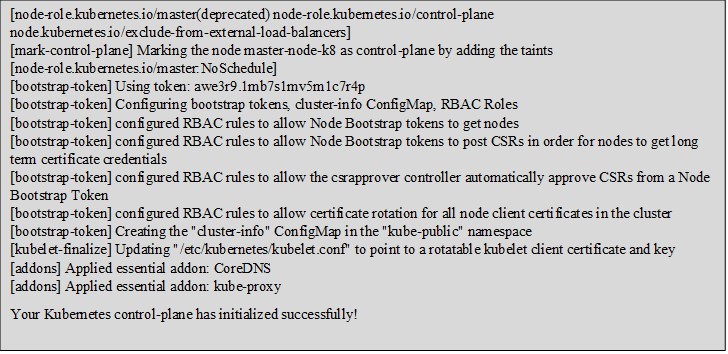
16. To start using your cluster, you need to run the following as a regular user:
mkdir -p $HOME/.kube
sudo cp -i /etc/kubernetes/admin.conf $HOME/.kube/config
sudo chown $(id -u):$(id -g) $HOME/.kube/config
Alternatively, if you are the root user, you can run:
export KUBECONFIG=/etc/kubernetes/admin.conf
You should now deploy a pod network to the cluster.
Run “kubectl apply -f [podnetwork].yaml” with one of the options listed at:
https://kubernetes.io/docs/concepts/cluster-administration/addons/
Then you can join any number of worker nodes by running the following on each as root:

#### Copy the above kubeadm join command – this has to be executed in both worker nodes#####
=================================================================
17. Check cluster status
Kubelet cluster-info
=================================================================
18. Remove taints from the master node

=================================================================
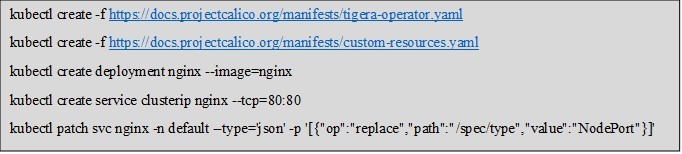
19. Install Calico Pod Network Add-on
20. Adding worker node to the cluster
To add the worker node to the Kubernetes cluster, follow step 1 up until Step 14.
Run the command generated by the master node for joining a worker node to the cluster.

21. In Master – to confirm if the pods have started, run the command

